
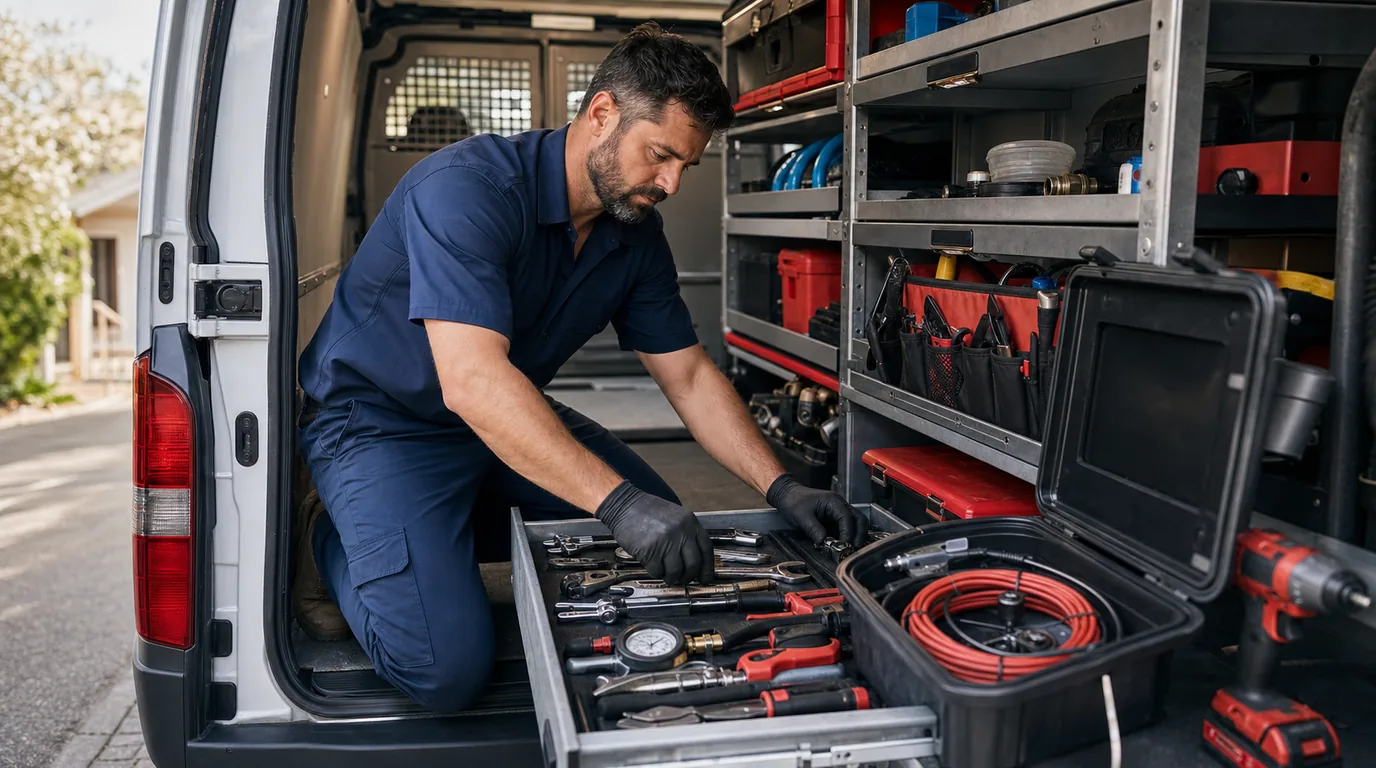
Best Plumbing Tools for Pros in 2026
Compare the best plumbing tools for pros in 2026, from essential hand tools to drain machines, inspection cameras, press tools, safety gear, and job software.
Key takeaways:
The best plumbing tool kit grows from the work a technician performs and the delays, risks, and repeat trips the business needs to prevent.
- Build a dependable core kit first. Hand tools, cutting and preparation tools, basic drain equipment, testing gear, lighting, and PPE solve the widest range of jobs.
- Use diagnostic tools to reduce guessing. Pressure gauges, moisture detection, cameras, and proper test equipment help document the cause before recommending work.
- Buy specialty equipment from real demand. Press tools, drain machines, jetters, and inspection systems should save measurable labor or support a profitable service.
- Protect the property and the technician. Containment, cleanup, lighting, maintained equipment, and appropriate safety gear belong in the professional setup.
- Organize and maintain the van. Consistent storage, inspection, charging, cleaning, and inventory routines keep tools ready for the next call.
A plumber can lose an hour because of one missing tool.
The shutoff is buried behind a sink. The fitting will not move. The drain machine cable is too short. The customer wants proof of what is blocking the line, but there is no camera on the truck.
That hour does not disappear. It becomes a second trip, a late appointment, or a job that earns less than expected.
The best plumbing tools are not the ones that fill the most drawers. They are the ones that help a technician diagnose the problem, protect the property, complete the repair, and document the work without unnecessary trips.
This guide covers the essential plumbing tools for apprentices, service plumbers, drain specialists, and small plumbing companies in 2026.
Pro tip from the author: “I buy a tool when it solves a problem the team sees every week. A tool that saves ten minutes on every call is usually worth more than a flashy tool that leaves the case twice a year.”
Quick Answer: What Tools Should a Professional Plumber Have?
A professional plumber should carry core hand tools, pipe cutting and preparation tools, basic drain-cleaning equipment, testing tools, safety gear, and a reliable way to document the job.
The core kit includes:
- two pipe wrenches
- adjustable wrenches
- tongue-and-groove pliers
- basin wrench
- tubing and plastic pipe cutters
- deburring tool
- hacksaw or compact reciprocating saw
- drill, driver, bits, and hole saws
- hand auger and closet auger
- water pressure gauge
- headlamp
- eye protection and task-appropriate gloves
- towels, containment supplies, and wet/dry vacuum
- phone or tablet with job notes, estimates, and invoicing
Add press tools, PEX tools, powered drain machines, inspection cameras, locators, and leak-detection equipment when the work volume can justify them.
Plumbing Tool Budget by Career Stage
Tool cost depends on the services you perform and what the employer provides.
Use these as planning ranges, not fixed prices.
| Setup | Typical planning range | What it usually covers |
|---|---|---|
| Apprentice hand-tool kit | $300 to $900 | Wrenches, pliers, cutters, drivers, measuring tools, PPE |
| Residential service kit | $1,200 to $4,000 | Hand tools, cordless tools, test gear, augers, cleanup supplies |
| Press and PEX upgrade | $1,500 to $5,000+ | Press or expansion platform, jaws, heads, batteries, accessories |
| Drain service setup | $2,500 to $15,000+ | Drain machines, cables, heads, camera, locator, containment |
| Full specialty van | $10,000 to $40,000+ | Advanced diagnostics, jetter, multiple machines, inventory, storage |
The total can climb fast when batteries, jaws, cables, inspection reels, and specialty accessories are included.
Do not buy the full list on day one.
Build the core kit first. Then use job history to decide which specialty tool removes the most wasted time or opens the best new service.
Best Plumbing Tools at a Glance
| Category | Best core tool | Pro upgrade | Main benefit |
|---|---|---|---|
| Grip and turning | Pipe wrench and tongue-and-groove pliers | Aluminum, offset, and strap wrench set | Better access with less damage |
| Pipe cutting | Tubing and plastic pipe cutters | Cordless cutter or compact band saw | Faster, cleaner cuts |
| Pipe joining | PEX crimper or expansion tool | Cordless press tool with compatible jaws | Faster repeatable connections |
| Drain cleaning | Hand and closet augers | Powered drain machine or jetter | Clears deeper and harder blockages |
| Inspection | Pressure gauge and moisture meter | Sewer camera and locator | Finds and documents hidden problems |
| Installation | Drill, driver, level, tape | Compact right-angle tools and laser | Faster layout and access |
| Safety | Eye protection, gloves, footwear | Task-specific PPE and containment system | Reduces exposure and property damage |
| Business workflow | Phone, photos, job notes | Scheduling, estimates, invoicing, inventory software | Keeps the work and paperwork connected |
1. Pipe Wrenches
The pipe wrench is still one of the most useful plumbing tools.
Its serrated jaws grip round threaded pipe and fittings. Most service plumbers carry at least two because one wrench holds the pipe while the other turns the fitting.
A practical starting set includes:
- 10-inch or 12-inch wrench for tight work
- 14-inch wrench for common service jobs
- 18-inch wrench for more leverage
Aluminum models reduce weight in the bag. Iron models often cost less and feel solid, but carrying several all day gets tiring.
Use a strap wrench on polished or finished surfaces that should not be marked by teeth.
2. Adjustable Wrenches
Adjustable wrenches handle supply lines, valves, compression fittings, and hex-shaped nuts.
Carry more than one size.
A small wrench works under a sink. A 10-inch or 12-inch wrench gives better leverage on larger fittings.
Look for:
- a jaw that stays tight under load
- clear size markings
- a comfortable handle
- a thin head for narrow spaces
A loose adjustable wrench rounds fittings and slows the job.
3. Tongue-and-Groove Pliers
Tongue-and-groove pliers grip irregular shapes, fittings, pumps, and larger nuts.
Many plumbers carry two medium pairs and one smaller pair.
The second pair matters when one tool must hold a fitting while the other turns the connection.
Choose handles that remain comfortable when wet and jaws that adjust quickly without slipping.
4. Basin Wrench
A basin wrench reaches faucet mounting nuts behind a sink where a normal wrench cannot turn.
It looks specialized because it is.
That is exactly why it earns space in a service bag.
A telescoping model gives more reach. A pivoting jaw helps approach a nut from different angles.
The tool may sit unused for several calls, then save half an hour on the next faucet replacement.
5. Faucet Key and Internal Pipe Wrenches
A faucet key opens common sillcocks and service valves.
Internal pipe wrenches or nipple extractors help remove broken or short threaded pieces when there is not enough material to grip from the outside.
These tools are small, affordable, and easy to forget until the exact problem appears.
Keep them together in a labeled pouch.
6. Copper Tubing Cutter
A tubing cutter makes a cleaner copper cut than a hacksaw.
Use a standard cutter where there is room and a close-quarters cutter near walls or between joists.
Carry replacement wheels.
A dull wheel can deform the tube, take longer to tighten, and leave more cleanup work.
After cutting, remove the burr before making the connection.
7. Plastic Pipe Cutter
Ratchet cutters make fast, square cuts in plastic pipe and tubing within their rated capacity.
They are useful for PVC, CPVC, PEX, and similar materials when the blade and tool are approved for the pipe.
Cold or aging plastic can crack instead of cutting cleanly.
Inspect the material, use the correct blade, and switch to a saw when the pipe condition or size calls for it.
8. Deburring and Reaming Tools
A cut is not finished until the edge is prepared.
Deburring tools remove sharp edges and internal ridges that can affect flow, damage seals, or interfere with a connection.
Carry tools that match the materials you install:
- inside-outside reamer for copper
- deburring blade for plastic
- fitting brush or abrasive cleaning tool
- depth gauge and marking tool for press fittings
The preparation step is small. Skipping it can create a callback.
Pro tip from the author: “I treat pipe preparation as part of the connection, not as optional cleanup. A fitting can only be as reliable as the surface under it.”
9. Hacksaw, Reciprocating Saw, or Compact Band Saw
No single cutting tool handles every plumbing material and access problem.
A hacksaw is inexpensive, predictable, and easy to control.
A compact reciprocating saw is faster for demolition and rough cuts. A compact band saw can produce controlled cuts on metal pipe where there is room.
Match the blade to the material.
Keep spare blades on the van and protect nearby finishes before cutting.
10. Cordless Drill and Impact Driver
A plumber uses cordless tools for anchors, fasteners, brackets, access holes, and equipment installation.
A compact drill fits more places than a large high-torque model. An impact driver handles repetitive fastening with less wrist strain.
Standardizing the van around one battery platform can reduce the number of chargers and spare batteries you need.
Do not let platform loyalty force the wrong tool choice, but count batteries and chargers as part of the purchase price.
11. Hole Saws, Auger Bits, and Step Bits
Clean access holes make installations faster and easier to finish.
Useful options include:
- hole saws for wood and sheet material
- auger bits for framing
- step bits for thin metal
- masonry bits for concrete and block
- right-angle attachments for tight joist bays
Check for hidden electrical, gas, water, and structural hazards before drilling.
Use the right speed and keep replacement pilot bits on hand.
12. Cordless Press Tool
A press tool creates mechanical connections using compatible fittings and jaws.
For service companies that complete many repairs, the tool can reduce shutdown time and avoid open-flame work on compatible systems.
The purchase decision must include more than the tool body.
Compare:
- pipe materials and fitting systems
- jaw and ring compatibility
- pipe-size range
- tool weight and access
- battery platform
- calibration or service interval
- documentation features
- local fitting availability
Never assume two jaws or fitting systems are compatible because they look similar.
Follow the tool and fitting manufacturer’s instructions.
When a Press Tool Pays Off
Imagine a $2,800 press setup saves 25 minutes on three service calls each week.
That is 75 minutes per week, or about five hours in a four-week month.
At a loaded labor cost of $60 per hour, the time value is about:
5 hours x $60 = $300 per month
That simple example suggests a payback near nine to ten months before counting added capacity, reduced fire-watch steps, or faster water restoration.
Use your real job count and labor cost before buying.
13. PEX Crimp and Clamp Tools
Crimp and clamp tools create connections for the PEX system they are designed to use.
A complete kit may need:
- crimp or clamp tool
- go/no-go gauge
- ring or clamp removal tool
- PEX cutter
- calibration tool
Check every connection according to the system instructions.
A fast connection is not useful if it cannot be verified.
14. PEX Expansion Tool
An expansion tool widens compatible PEX tubing so it can recover around a fitting.
Cordless expanders speed up repetitive work and reduce hand fatigue.
Compare head sizes, automatic rotation, access, battery life, and the exact tubing system supported.
This is not a universal PEX tool. It belongs to a specific installation method.
15. Torch, Ignition Tool, and Heat Protection
Where soldering is appropriate, use a reliable torch, ignition method, cleaning tools, flux, solder, and heat protection.
The protective setup matters as much as the flame.
Carry:
- heat shield or flame-resistant pad
- fire extinguisher appropriate for the work area
- inspection mirror
- spray bottle or other approved cooling and control supplies
- lighting that makes the full work area visible
Follow local code, permit, fire-watch, and job-site requirements.
Do not use a flame near unknown materials or hidden combustible spaces without proper controls.
16. Plungers
Keep separate plungers for toilets and flat drains.
A flange plunger seals around a toilet opening. A cup plunger works better on flat sink or tub drains.
Store them so they do not contaminate other tools.
A plunger is simple, but it can solve a basic blockage without bringing a machine into the home.
17. Hand Auger
A hand auger reaches beyond the trap for common sink, tub, and shower stoppages.
Choose cable length and diameter for the drains you service.
Use the correct head and avoid forcing a cable through a fitting it can damage.
Clean, dry, and inspect the cable after use. Rust and kinks shorten its life.
18. Closet Auger
A closet auger is designed for toilets.
Its guide tube protects the bowl while the cable passes through the trapway.
This is safer for the fixture than improvising with a general drain cable.
Keep the guard clean and replace a cable that develops sharp damage.
19. Powered Drain Machine
A powered drain machine handles blockages beyond the reach or strength of a hand auger.
The right machine depends on pipe size, cable length, access, and the type of blockage.
Compare:
- cable diameter and capacity
- drum or sectional design
- transport weight
- stair and roof access
- cable control
- compatible heads
- containment and cleaning process
- training requirements
Drain machines can injure a technician when cables bind, twist, or contact hazards.
Training and task-appropriate PPE are part of the tool setup.
20. Hydro Jetter
A hydro jetter uses high-pressure water to clean buildup from drain and sewer lines.
It can be effective for grease, sludge, and other deposits when the pipe condition and blockage are suitable.
Before jetting, inspect the line when needed and understand where the water and debris can go.
A damaged or collapsed pipe needs a different plan.
Jetters require training, nozzle selection, pressure control, hose care, and protective equipment.
This is a specialty purchase. Rent or subcontract until the job volume and training justify ownership.
21. Sewer Inspection Camera
A sewer camera lets the technician inspect the inside of a drain or sewer line.
It can identify:
- roots
- offsets
- bellies
- cracks
- scale
- foreign objects
- the location of a blockage
Video also helps explain the recommendation to the customer.
Choose a camera based on pipe sizes, push-cable length, head size, recording quality, and serviceability.
A locator can help mark the position and depth of a compatible camera head or sonde.
Pro tip from the author: “I do not use a camera only to sell a repair. I use it to show what I found, save the evidence, and make the next technician’s job easier.”
22. Water Pressure Gauge
A pressure gauge is small, inexpensive, and useful on many service calls.
It helps check static and working pressure, pressure-reducing valve performance, and possible pressure-related problems.
Use the correct connection and understand what conditions can change the reading.
Record the result in the job notes instead of relying on memory.
23. Moisture Meter and Leak-Detection Tools
A moisture meter can help find damp building materials and compare affected areas.
It does not prove the source by itself.
Combine it with visual inspection, pressure testing, thermal patterns, listening equipment, or other methods appropriate to the problem.
For hidden leaks, good documentation matters. Record the reading, location, surface, and conditions.
24. Test Plugs, Pumps, and Gauges
Testing tools help verify that a system holds pressure or contains flow as required by the work and local code.
The exact kit depends on the systems you install.
It may include:
- mechanical test plugs
- inflatable test balls
- pressure test pump
- calibrated gauges
- hoses and adapters
- caps and temporary fittings
Inspect test equipment before use. Follow the rated pressure and installation instructions.
A failed plug can release stored energy and cause serious injury or property damage.
25. Measuring and Layout Tools
Simple layout errors create expensive rework.
Carry:
- tape measure
- torpedo level
- marker and pencil
- folding rule when useful
- angle finder
- laser level for longer runs or multi-point layout
Use a marker that remains visible on the material without damaging finished surfaces.
26. Headlamp and Work Lights
Plumbing work often happens under sinks, in crawlspaces, behind equipment, and during outages.
A headlamp keeps both hands free.
Add a compact magnetic or clamp light for the wider work area.
Choose lights that share batteries with the van when practical and keep one simple backup light that does not depend on the main battery platform.
27. PPE and Containment Supplies
The correct PPE depends on the hazard.
A basic plumbing setup may include:
- safety glasses with side protection
- face protection for splash or flying debris when required
- task-appropriate gloves
- protective footwear
- hearing protection
- knee protection
- respirator only when the hazard assessment, fit, and rules require it
- disposable coveralls or protective clothing for contaminated work
PPE should fit the worker and stay clean enough to work as designed.
Also carry property-protection supplies:
- drop cloths
- absorbent pads
- buckets
- plastic sheeting
- drain pans
- disinfecting and cleanup supplies appropriate for the job
28. Wet/Dry Vacuum and Cleanup Kit
The repair is not finished if water, debris, and packaging are left behind.
A compact wet/dry vacuum helps control small spills and collect cleanup debris.
Use equipment rated for the material being collected. Do not use a general vacuum for hazardous dust or contamination it was not designed to handle.
Keep towels, bags, brushes, and surface-protection supplies together.
Customers notice the condition of the room after the tools are packed.
29. Plumbing Job Management Software
Software is not a substitute for a wrench, but it keeps the physical work connected to the business.
A phone or tablet can hold:
- customer details
- job address and access notes
- photos and videos
- estimates
- material notes
- technician time
- invoice and payment status
- follow-up reminders
- warranty history
For a small crew, Workly plumbing software can keep scheduling, job notes, estimates, invoices, and payments in one workflow.
That matters when a technician finds an additional problem and the office needs to update the scope before the work continues.
Beginner Plumbing Tool Checklist
An apprentice should confirm what the employer provides before buying.
Start with tools you will use on most jobs.
- 10-inch and 14-inch pipe wrenches
- 6-inch and 10-inch adjustable wrenches
- Two tongue-and-groove pliers
- Basin wrench
- Multi-bit and stubby screwdrivers
- Copper tubing cutter
- Plastic pipe cutter
- Deburring tool
- Hacksaw with spare blades
- Tape measure and torpedo level
- Headlamp
- Safety glasses
- Task-appropriate gloves
- Tool bag with labeled small-parts pouches
Add power tools and specialty systems after learning the company’s standards.
Buying incompatible jaws, heads, batteries, or fitting tools is an expensive beginner mistake.
Service Plumber Van Checklist
A residential service van needs enough range to solve common jobs without becoming impossible to organize.
Core Service Tools
- Full wrench and plier set
- Faucet and internal pipe tools
- Cutters, saws, reamers, and prep tools
- Drill, driver, bits, and hole saws
- Hand auger and closet auger
- Pressure gauge and basic test gear
- Moisture meter
- Work lights
- Wet/dry vacuum
- PPE and containment supplies
Add by Service Mix
- Press tool and compatible jaws
- PEX connection system
- Powered drain machine
- Inspection camera and locator
- Leak-detection equipment
- Pipe threader
- Freeze or thaw equipment where relevant
- Water heater service tools
Documentation
- Charged phone or tablet
- Job photo process
- Estimate and change-approval workflow
- Invoice and payment workflow
- Tool inventory list
- Maintenance and calibration log
How to Choose Between Budget and Pro Plumbing Tools
Price alone does not decide value.
Compare the tool against the work.
Buy the Better Tool When:
- it is used every day
- failure would stop the job
- accuracy affects safety or inspection
- the tool reduces strain
- parts and service are available
- one battery platform covers several needed tools
- documentation or calibration matters
A Budget Tool May Be Enough When:
- it is a simple backup
- the task is low frequency
- the tool has no critical measurement function
- replacement is easy
- the cheaper design still fits the material and rating
Do not save $40 on the tool that protects a $4,000 fixture or keeps a technician from making a second trip.
Should You Rent or Buy Specialty Plumbing Tools?
Rent when the job is occasional, the tool is expensive, or the team is still testing demand.
Buy when the tool is used often enough to recover its cost and the company can maintain it.
Use this simple formula:
Monthly tool value = labor saved + rental fees avoided + added gross profit from new jobs
Then estimate:
Payback period = total purchase cost / monthly tool value
Include accessories, batteries, training, service, storage, and insurance in the purchase cost.
A $3,000 tool is not a $3,000 investment if it needs another $1,500 in jaws and accessories before the first job.
How to Organize Plumbing Tools in a Van
Good organization reduces search time and missing tools.
Group tools by job:
- faucet and fixture bag
- copper and soldering kit
- PEX kit
- drain-cleaning zone
- inspection and test kit
- water heater kit
- PPE and containment kit
Label drawers and cases.
Put the most-used tools between knee and shoulder height. Keep heavy machines low and secured.
Use a checkout or inventory process for specialty tools shared across technicians.
At the end of the day, charge batteries, clean cables, restock consumables, and flag damaged tools.
Plumbing Tool Maintenance Checklist
- Clean and dry tools after wet or contaminated work.
- Inspect cords, batteries, housings, and guards.
- Replace worn cutter wheels and saw blades.
- Lubricate tools according to manufacturer instructions.
- Check drain cables for rust, kinks, and damage.
- Clean and inspect camera heads and push cables.
- Verify gauges and calibrated tools on schedule.
- Confirm press-tool service intervals.
- Replace damaged PPE.
- Record repairs and missing accessories.
A maintenance log is cheaper than discovering a dead battery, broken cable, or overdue calibration at the customer’s home.
Common Plumbing Tool Buying Mistakes
Buying Before Defining the Service
A drain camera does not make sense for a company that does not offer drain diagnostics.
Start with the service plan.
Ignoring Accessories
The tool body may be only half the cost.
Price the full working setup.
Mixing Too Many Battery Platforms
Several chargers, battery types, and spare packs add cost and take space.
Standardize where it does not limit the work.
Skipping Training
Power drain equipment, jetters, press tools, and test plugs can create serious problems when used incorrectly.
Training is part of the purchase.
Failing to Document Tool ROI
If a tool saves time, track it.
If it opens a new service, track the jobs and gross profit.
If it never leaves the case, stop buying more accessories for it.
What Are the Five Most Important Plumbing Tools for a Beginner?
Start with pipe wrenches, tongue-and-groove pliers, adjustable wrenches, a tubing or plastic pipe cutter, and a basin wrench.
Add basic measuring tools, drivers, lighting, and PPE at the same time.
The exact list depends on what the employer provides and whether the work is service, new construction, commercial, or drain cleaning.
What Is the Most Expensive Tool a Plumber Needs?
For many service companies, sewer inspection systems, locators, hydro jetters, powered drain machines, and large press or threading systems are among the most expensive purchases.
Not every plumber needs to own them.
Rental, subcontracting, or shared company equipment can make more sense until demand is consistent.
Are Cordless Press Tools Worth It?
A cordless press tool can be worth the cost for a company that performs enough compatible repairs and installations.
It can reduce connection time, work on wet systems in some applications, and avoid open-flame work.
Calculate payback using real weekly job volume. Confirm fitting availability, system compatibility, jaw range, service requirements, and training before buying.
Final Takeaway
The best plumbing tool kit grows from the work, not from a shopping list.
Start with dependable hand tools, cutting tools, basic drain equipment, test gear, lighting, and PPE. Add specialty tools when they save measurable labor, support a profitable service, or improve diagnosis and documentation.
Keep the van organized. Maintain the equipment. Record what each job needed.
The right tool should do more than finish one repair. It should help the technician complete cleaner work, protect the customer’s property, and move to the next job with fewer delays.